Menu bar

Showing posts with label tutorial. Show all posts

Easy Knitted Slippers Pattern - Gentle Steps for All Ages

30.8.25

 While working away on my new knitting designs (coming soon!), I somehow found myself knitting… yet another pair of cosy slippers!

Did I already mention that after years of not knitting socks, I’m now completely addicted? Probably I did… 😉


Anyway, I’m really happy to introduce my newest design to you today - the Gentle Steps Slippers!

My idea was to create super simple, almost invisible slippers with a clean, minimalist look. After some thinking and swatching, I realized that good old stockinette stitch was the best choice — even if it’s not something I usually go for!

Even the edge band is done in stockinette. And I actually included two versions of the edge band in the pattern - more on that below.


To make my pair special, I added a few little embroidered hearts - just a sweet detail. There's a photo tutorial in the pattern and a video tutorial on my YouTube channel if you’d like to add them too, but of course, feel free to skip them! The slippers also look great plain, especially if you use multicoloured or speckled yarn. 


Tutorial is here: https://www.youtube.com/watch?v=NGhBfSVO3Aw 

 About the pattern:

- Beginner-friendly.

- Written for both children and adults.

- Knit toe-up, with a shaped sole, short-row heel, and finished with an edge band.

- Uses 4-ply sock yarn


Edge band options:

- Simple stockinette edge — clean, minimal, and perfect for quiet days at home

- Double-layered edge band — designed with busy kids (or active adults!) in mind. It offers a snugger fit and you can even add a thin elastic cord inside if needed!

Knitting pattern for Gentle Steps Slippers is available from Ravelry and Lovecrafts.


To see some behind the scene photos you can follow me on Instagram.

You are also welcome to join my Facebook knitting group to share your work and get some help with my patterns.


Read more ...

How to read a yarn label knitter's information

8.2.24

Yarn label is not only beautiful piece of packaging, it also a great source of information about your yarn – things like fibre content, yardage, type of yarn, recommended gauge and knitting needles as well as care instructions. 

While some information such as needle size is advisable there is part of label with about yarn-weight and fibre content which provide the important information about the yarn at first glance and help to find the correct yarn for the next project. 

Most brands provide the all necessary details about their yarn, however how labels represent this information can differ. So let’s see some label examples and how to read them.

But before we start it is also important to mention that standard of yarn weight and how it specified can differ from country to country. Below you can see the table of standard yarn weights and conversion from the Craft Yarn Council


1. How to read yarn gauge information.

The gauge of yarn is normally presented in a square graphic with 4″/10 cm label on the left, which means size of the square swatch. Along the bottom it says “18 sts” and along the right side it says “24 rows”. In the centre of this square you can find knitting needles and/or crochet hook symbols with recommended sizes.


In other words, the label suggests that yarn should be knitted with gauge of 18 sts & 24 rows = 4″/10 cm using a US 8/5mm needle.
In one of my older posts we discussed that the knitting gauge on a label is manufacturer recommendation and should be used as a guidance and starting point for swatching. However, the knitter’s gauge depend on many factors and it is more important to check and follows the gauge recommended in your pattern. See more here


As you can see some examples of yarn gauge provided in different formants from different brands.

2. Fibre content of the yarn.

This information is normally written in words and tells you the all fibres are used – animal fibre, plant fibre or artificial material. This information helps you decide which type of project you can knit with this yarn. You can read about choosing the yarn for knitting project here.
 
3. Care instructions.

This information is very important and explain how to care of your future garment. Some yarns can be washed in washing machine and even tumble dried while other delicate materials require hand washing and drying flat. In first case you can even find the word “super wash” or the abbreviation SW on your label. 


Although yarn manufacture provide this piece of information, it is always recommended to knit a swatch and wash it the same way as you plan to care of your future garment in order to make sure the yarn wouldn’t change after washing and your favourite knitted piece would last for a long time.


4. Size of yarn skein. 
On every label you can find weight of skein as well as the yarn length in yards and meters. This information helps you to calculate the required quantity of yarn for your project. 


5. Other useful information.

Last but not least important information is colour/shade (in words or number code) of yarn and dye lot. Please see photo above. Those would help you to buy extra yarn in case you run out of it in the middle of knitting. While colour code stays the same from batch to batch, the dye Lot number changes and slight difference in shades may occur. Some big sellers provide this information in yarn description and allow to choose the dye lot. However, if you have bought a yarn long time ago, the chance to find the same lot is extremely low.
I hope the provided information would help you to read yarn labels and choice the suitable yarn for your next knitting or crochet project easier. 


To see some behind the scene photos you can follow me on Instagram.

You are also welcome to join my Facebook knitting group to share your work and get some help with my patterns.

Read more ...

Choosing the Right Yarn for Knitting Project

28.11.23

The yarn choice is a crucial factor in any project, dependent on various factors such as the season, your concept, fibre preference, pattern recommendations, and the budget. The simplest way to ensure the right yarn for your project is to choose the one recommended in the pattern. However, this isn't always possible for reasons like yarn availability in your country, price, limitation of colours, etc. Let's explore how to find suitable yarn for your project based on quality and appropriateness.

Yarn Weight (Thickness)

If you are looking the yarn for particular pattern, then this step is answered. You must follow the designer recommendation for yarn’s type to achieve a great result. In other words, if your patten calls for DK weight yarn, then find suitable DK yarn, otherwise you wouldn’t be able to get the correct gauge and your finished item would be smaller or bigger than needed.

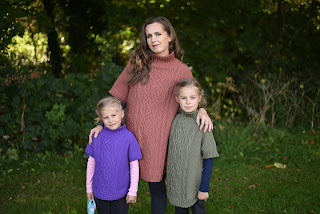
Family look in matching knitted ponchos
Note: Those three ponchos are knitted in Aran weight yarn with different fibre combination or wool type from three different brands. For one of those ponchos I had to adjust the knitting needles size to get the correct gauge. Patterns Cable Fantasy poncho and Adult Cable Fantasy poncho


In one of my previous posts you can find useful information how to check your knitting gauge (tension) correctly and what to do if it does not match the recommended in the pattern - check them out here.

However, if you are looking for the yarn for your own idea you have bigger choice and do not have to stick with a particular thickness of yarn. Your choice is much bigger.

When considering yarn weight, think about when and how you'll wear your garment. Are you going to wear your garment next to skin? Will it be a second layer over a long sleeve top or shirt? May be you need a bulky or super chunky yarn for extra warm piece to replace a jacket or lightweight coat.

Family look in matching knitted ponchos
Note: Adult Temptation poncho is knitted with Cascade Ecological wool, which is chunky yarn and suitable for warm comfy ponchos and heavy weight outwear. Child Temptation poncho is knitted with West Country tweed from Blacker yarns. 

Fingering/4-ply, sport/5-ply, and DK/8 ply yarns in plant-based fibre or wool blend create excellent garments and accessories for spring/summer as well as early autumn. Thicker woolly yarns in DK, worsted, Aran, or bulky weight are perfect for winter. If you need something in between those gauges you can always add a strand of lace weight yarn such as mohair to your main yarn and knit them together. This method is also helps to create new colours without dyeing of your yarn. 

Hand knitted shawl in garter stitch
Note: Statice shawl is knitted with strand of DK weight yarn hold together with strand of mohair yarn in contrast colour. 


Materials and fibre content

If you aim to enjoy your knitted garment for years, I recommend opting for yarn made with natural fibres or a wool blend with a minimal percentage of nylon, unless there's a specific reason for using artificial fibres like acrylic. There are options available for every budget in the market.

For a universal garment suitable for any season, consider mixed yarns like cotton-wool, wool-viscose, or wool-silk blends. These combinations provide a great balance, not too warm yet perfect for chilly evenings and unexpected windy days in summer.
For colder seasons, choose warmer yarns such as alpaca, merino, Shetland, angora, cashmere, and others, available in various weights.
However, if you are looking the great yarn for a pair of socks, then at least 15% of synthetic such as polyamide or nylon in it's fibre content is must. Otherwise your socks will wear out way too fast. Do not be tricked by yarn description "sock yarn", always check the fibre content! 

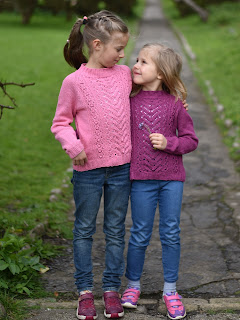
Two girls are modelling in matching knitted sweaters in different pink shades
Note: D-light sweater is knitted with 85% of cotton and 15% off cashmere yarn, which makes it perfect garment for any season. 


Choosing the Perfect Colour

Picking the right colour is crucial but tricky. A well-chosen colour enhances your enjoyment of the garment, while the wrong one might relegate it to the depths of your closet. Take time to think about the design and plan how you'll style your future garment.
Bright, vibrant shades lift dull days, while neutral or pastel colours provide extra cozy moments. Hand-dyed yarn from indie dyers offers impressive colour combinations and unique, often non-repeated shades.
Remember, yarn choice depends on the chosen stitch too. Simple stitches like stockinette, ribbing, and garter stitch look great with any yarn and colour. However, for more intricate cable or lace designs, avoid variegated yarn in contrasting shades; simple neutral colons showcase the stitch's beauty better.

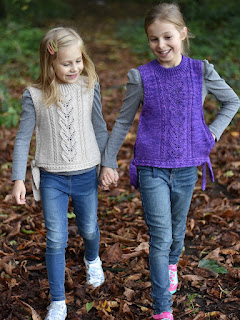
Two girls are modelling in matching knitted vests
Note: Both Hoya vests are knitted with DK weight yarn. The purple vest is knitted with luxury hand dyed yarn and the light vest is knitted with budget yarn. Both vest look great, but the cable is standing out on a light yarn a bit better

Price

Yarn prices vary widely, from a few pounds per skein. Depending on your budget choose budget-friendly yarn from well-known brands or exclusive blends from small companies and local businesses. Regardless of your choice, ensure the yarn isn't discontinued, and you have extra skeins if you decide to modify your project by adding length or width. It is not possible to buy an additional skein in from the same dye lot in case you run out of yarn. 

Little girl is modelling in hand knitted poncho in grey

Note: E-motion poncho is knitted in budget friendly yarn Mary Maxim Natural Alpaca Tweed. 

And don't forgot to check your stash! There is a big chance that your perfect yarn is already waiting for you in your treasure cabinet.

To see some behind the scene photos you can follow me on Instagram.

You are also welcome to join my Facebook knitting group to share your work and get some help with my patterns.


Read more ...

Elwy Hood knitting pattern

27.12.22

 Elwy hood is warm, comfortable and universal. It is one of those garments which you can wear on the go to protect you from cold and wind. Roomy enough for long hair, the Elwy hood is designed with big comfortable cowl for extra warmth around neck and shoulders area. 

Elwy Hood is knitted seamlessly in two steps starting with cowl part and finishing with hood itself. Cowl part is knitted top down, and then the stitches picked up along neck edge for the hood. German short rows used around neck shaping in order to make the comfortable fit around neck and face. Double neckband hides neck edge for neat result and professional look.


The hood can be worn both wrong and right sides outside due to its construction and finishing.

The pattern calls for Aran weight yarn and it is written for both children and adult. Pattern has a photo tutorial for transition from cowl to hood. 


Knitting pattern for Elwy hood is available from Ravelry and Lovecrafts

Special discount for blog readers: Use code NEW15 to get 15% off on Ravelry. Offer valid until end of 2022.

Read more ...

Five reasons to block your knitting

7.3.22

Based on my questionnaires’ in the FB groups, many knitters skip blocking the finished knitted/crochet garment for a number of reasons. Let us find out what blocking is and why it is recommended not to ignore this important step.

What is blocking?

Blocking is the process of wetting/washing or steaming finished knitted parts or garments in order to give them their permanent size and shape. 

Blocking can be done before or after seaming

Why I recommend blocking/washing the knitted garment before starting wearing or gifting it.

1. As you knit, the edges of the pieces can be rolled badly, especially in stockinette stitch. Blocking helps to eliminate or reduce this problem and flatten the fabric, which helps with seaming. 

2. Blocking helps to even the stitches and makes fabric more pretty. This point is very important for lacy garments and shawls. Most lacy stitches does not look beautiful until blocked (see the first photo in this post). Blocking helps to reveal beautiful lacy stitches and “read” them.

3. Many wool yarns such as merino wool, mohair, angora, etc. become much softer and more hairy after being blocked and washed for the first time.

4. You can make some changes to the shape and size of you knitted garment or pieces (if you block before seaming) as you block. The amount of change that you can achieve with blocking depends on the type of yarn, your knitting tension (how tight the finished fabric is) and blocking method. Wet blocking allows for more changes than steaming.

5. Wet blocking is also an important step to wash out dye residue, grease and other contaminants from knitwear prior to first wear. Every inch of yarn passes through our hands and can absorb grease, dirt, hand cream, etc. All this stuff should be washed out, especially on baby and children knitwear. 


To see some behind the scene photos, you can follow me on Instagram.
You are also welcome to join my Facebook knitting group to share your work and get some help with my patterns.
Read more ...

Driftwheel Cardigan - pattern release

29.11.21

Finally, I am ready to share the most comfortable male design I have ever created – Driftwheel Cardigan.

Knitted in DK weight yarn, this cardigan is perfect staple for any wardrobe. Cardigan features boxy silhouette, raglan sleeves and comfortable stand up collar. Designed with plenty of positive ease and zip closure, this garment is perfect for any time of the year. Diamond stitch on cardigan’s body combined with textured ribbing on collar and edge bands, the sleeves knitted in stockinette. 

For this cardigan, I used lovely yarn Debbie Bliss Erin Tweed in pretty shade Teal. This yarn has creates beautiful fabric which does not change after blocking. It is really soft and gentle to skin.

The pattern is written for wide range of sizes from S to 3XL and has photo tutorial for zip closure. 

It can be found on Ravelry and Lovecrafts.

To see some behind the scene photos you can follow me on Instagram. You are also welcome to join my Facebook knitting group to share your work and get some help with my patterns.
Read more ...

Invisible joining in the round - tutorial

13.4.21

 Invisible joining of the cast on round is the great benefit of circular knitting.

There are a few different methods of joining and today I'd like to share the most invisible one. 

Step 1

Cast on one extra stitch and place the circular needle as shown below:


Step 2
Slip last cast on stitch to left needle and place it over the first stitch, pull the working yarn to close the gap

Step 3
Start knitting in the round as per your pattern. At the end of knitting you will need just waive in the cast on edge of yarn. 


Happy Knitting!!!

P.S. The yoke of Starflake Sweater is pictured in the first photo. The pattern is available from Ravelry and Lovecrafts
Read more ...

I-cord cast on

29.1.19
Happy knitting everyone! Today I’d like to share a useful technique – I-cord cast on.


"I-cord cast on" helps to start your knitting with beautiful cord along the edge of knitted piece and prevents it from rolling. I-cord cast on can be used for neat neck edge for top-down knitted sweaters, beautiful bottom edge for bottom up sweaters, for shawls and cowls, and etc.
This cast on takes a bit more time than long tail cast on and requires a bit of practice but as soon as you sharp this skill it shouldn’t be a problem.

"I-cord cast on" photo-tutorial:


For this type of cast on I recommend to use double-pointed knitting needles.

Step 1. Cast on 3 sts using long-tail cast on. Place the needle into left hand and slip all sts to the right end of needle (=left hand needle). The working yarn is on the left.
Step 2. Bring the working yarn across back of all stitches on the left hand needle to first stitch. With right-hand needle, knit into front and back of first stitch. Slip this stitch off the left needle. [=2 sts on right needle]
In order to avoid too-loose cast on row pull those stitches tightly as you knit.

Step 3. Knit the next two stitches on left hand needle. [= 4 stitches on right hand needle]

Step 4. Do not turn your knitting piece and slip 3 stitches back to left hand needle.

Step 5. Knit into front and back of first stitch on left hand needle. Knit two stitches. [=5 stitches]

Repeat steps 4 and 5 slipping 3 sts back to left hand needle all the time until you have the required number of stitches plus one extra stitch.


Step 6. Do not turn you knitting and slip two stitches back to left hand needle. Knit those two stitches together (k2tog). The last step helps to form a pretty neat end of your cast on.

Step 7. Start to knit your project as usual.

Note: If the first row after I-cord cast on looks too loose (elongated cast on row) then you need to pull your cast on stitches more tightly or use the smaller size of knitting needles.
  
Below is example of I-cord cast on for my newest cowl design. I used this cast on for the bottom corner of cowl front as well as for back. The edges of front are knitted with double edge stitches which form the I-cord edge too.


Read more ...